Highly Liquid MIDI

Highly Liquid

Just finished installing the Highly Liquid UMR MIDI interface in a Casio SK-5. This was our first sampler. Very nice crunchy lo-fi sound. In combination with Redmatica Autosampler it’s a great source of new sounds. It changes anything you put into it. Look out for a new madtheory sample pack in the next few months! It’s really nice to play this toy from a weighted keyboard, and Kontakt adds a lot to it as well.

IMG_2531

More old samplers

I’m of fan of old samplers. Well, to be specific, I’m a fan of the sounds. For me it’s no fun at all trying to get old technology to work reliably and to integrate into the studio. There’s nothing worse than battling with a faulty floppy disc when you have a burning idea for a tune.

Some folk like to hear the sound coming from the actual sampler, they say it’s better. Well here’s a pretty good comparision test. It’s the intro to the Pet Shop Boys West End Girls, using the Emu Emulator II Marcato strings. One file is the Emu sound files imported from the original disc into Kontakt using the wonderful EMXP, the other is the sound sampled from the output of an actual Emulator II; analogue, naturally.

Which do you prefer? 🙂

EII strings A
EII strings B

mp3 versions:
EII strings A
EII strings B

Fairlight sounds

Over on the Sound On Sound Forum there was an investigation into some of the sounds on Kate Bush’s Hounds of Love album. Poster desmond managed to figure it all out. So I dug in myself and did a few tests with Fairlight sounds, adding the Linn 9000 drums that desmond was unable to nail:

Under Ice

Watching you without me

Running Up That Hill (A deal with God)

Two 1982 Quantec QRS units (as used by Kate Bush) and the 1987 QRS/XL.

Except for Watching you without me all of the sounds in these tracks were achieved by processing simple single note samples of a cello, specifically Cello 1 and Cello 2 from the Fairlight IIx library. The wonderful airy droning sounds are created by playing a chord into a reverb set to infinite decay. It appears that Ms. Bush used the Quantec Room Simulator for this. Mike Oldfield used this machine for the same effect on his Crises album, as well as the Fairlight.

I haven’t got the chord progression quite right on Running Up That Hill, but it’s sufficient to see how the sounds were put together. What amazes me is that, dry, this pitch modulated Fairlight cello sounds unusable. Goes to show what a creative lady she is.

Kate with her Fairlight

Fun with synths

First, the Roland V-Synth. Totally unique abilities, and intuitive to use:

The V-Synth does an exact replica of the Roland D-50, an early sample playback synth with some bizarre but useful compromises. Classic sounds:

Then the Kawai K5. Additive synth, interesting in theory but in reality not productive. Some good sounds though:

The K1r, another severely compromised sample playback machine. The poor man’s D-50. But again, the compromises are musically useful:

And finally, the Korg EX-800, a strangely compromised analogue subtractive synth:

In theory, the V-Synth can make any sound that the others can make. But the peculiar design compromises that were made in order to get these synths into the market place, can lead you down some interesting avenues in the quest for new sounds.

Test

OK, so new server, latest version of WordPress, trying to figure it all out (thanks Stan!!). The site content will be  lot more organised over the coming weeks. And there will be NEW music and pictures on the way!

It’s a bit of a mess because we’re translating from old HTML tables into WordPress. So please excuse the occasional ugliness on the site.

So what’s Acoustic Treatment then? (a guide for beginners)

It’s not egg boxes, foam, or “Auralex” (used by itself).

Generally speaking, sound proofing is expensive, acoustic treatment is not. Sound proofing needs lots of heavy material, and structural support to go with it. You need a pro to do the job, and there’s no cutting corners there. Conversely, acoustic treatment is all about cutting corners, in fact, removing them from the room! It’s easy to DIY. Here’s a simple and highly effective solution.

Basically, the goal with acoustic treatment is to create a room that acts as if there are no walls reflecting the sound. The ideal is “outside”. So as much absorption as you can get in there, while retaining some pleasant reflections via diffusion. You can make a diffuser with a large piece of curved plywood. For more info, Ethan Winer has an excellent article on acoustics on his site.

These will not get you to posh professional level acoustics, but will get you 50% to 80% of the way there, depending on how much work you put in. Just like high end gear, there is a diminishing return the more you spend.

It is simply amazing how much easier it is to mix in a room with this level of treatment.

The control room and the studio
These are the two rooms that every studio should have, assuming you’re recording acoustic instruments.

The control room is the one that needs to have a flat response, achieved as I have already described- basically, absorption.

You can do whatever you like in the studio, to create your signature sound. But generally speaking plenty of diffusion is preferred to avoid big peaks and nulls in the response, and to keep little ones for the character sound. This also retains the room’s natural reverb. So little or no absorption.

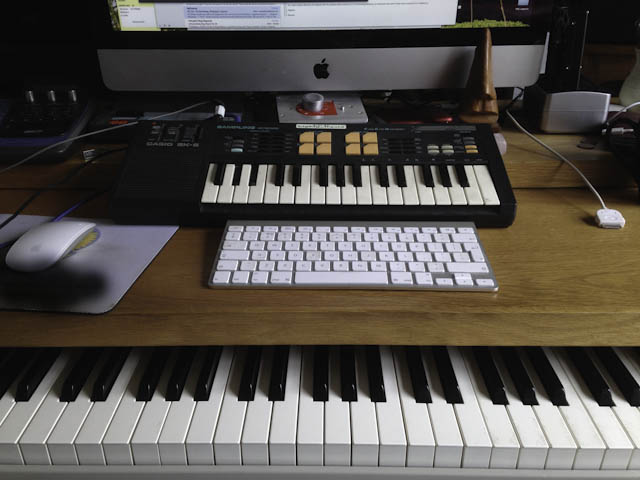
Every listening room will need treatment. You know you need it when you find that certain notes, especially bass ones, jump out louder than others. Set up an organ sound on your keyboard, set all eq to flat and play all the notes starting at the lowest the keyboard can make. You’ll find some notes are loud, some are quiet, and it depends on where your ears are. An inch move and they’ll sound different.

Space is expensive, and if you’ve got to live in the place also, compromise is called for. Here are two compromises I’d suggest, if you only have one room available:

1. Use portable bass traps. Store them for tracking, install them for mixing. The other way around for difusers. I reckon you’ll still get around a 50% improvement in room acoustics, which is a lot! And it’ll be cheaper. Assuming the missus doesn’t mind the spare room being full of crap while you’re recording!

2. Commandeer a spare room as a studio only when you need to track. Permanently install attractive looking difusers and run a multicore in there. Shift the bed or WHY for sessions. Then you can have superchunks etc. permanently installed in the control room

Room mode measurement
I think that on a tight budget, measuring room modes is an academic exercise. You can actually gain a lot of improvement by literally putting in as much superchunk as you can without any mode measuring. Maybe later you can measure and look at building absorbers for bass, low mid, hi mid , HF diffusion or whatever you need. After that, it’s expensive, complicated and returns are severely diminished.

But my all means measure before and after so you can pat yourself on the back. 🙂

Philips DCC

Back in 1996, I bought a Philips DCC600 to mix onto. It was cheaper and better sounding than Sony Minidisc at the time. It was one of those typical technology battles, with the lesser quality but more convenient format winning. A bit like the 8 track cartridge. These used wider tape than a cassette so sounded far better. The proof is that they were still used in radio broadcasting up to ten years ago, long after the format had died in the domestic market.

Then I moved over to recording in the computer. I transferred some stuff from DCC in 16 bit. Along the way, I acquired a free Philips DCC730. A few months ago I transferred some of my old tapes (you can hear these old tracks on the music page). Turns out that the DCC730 puts out 18 bits via S/Pdif, so I set the DAW to record 24 bit. I use the TobyBear Bit Viewer plugin to measure that. In a direct comparison, these transfers have much more depth than the previous 16 bit ones. Comparing the two, the 16 bit transfers from DCC600 show all the hallmarks of quantising distortion.

This is interesting because DCC uses PASC, basically mpeg layer 1 audio compression. So the converter outputs an 18 bit digital word, even though most of the stuff was recorded via the 16 bit converter on the DCC600 (with its DC offset), or the 18 bit converter on the DCC730. Those extra bits seem to mitigate the ADPCM compression, somewhat.

With careful attention to harmonics and imaging in the mastering, the DCC recordings can sound really good.

Hopefully, this info will be useful to anyone out there with this old technology. Interestingly, the technology developed for DCC is now used in hard drives, and beer filtering systems! 🙂