Yamaha CP80

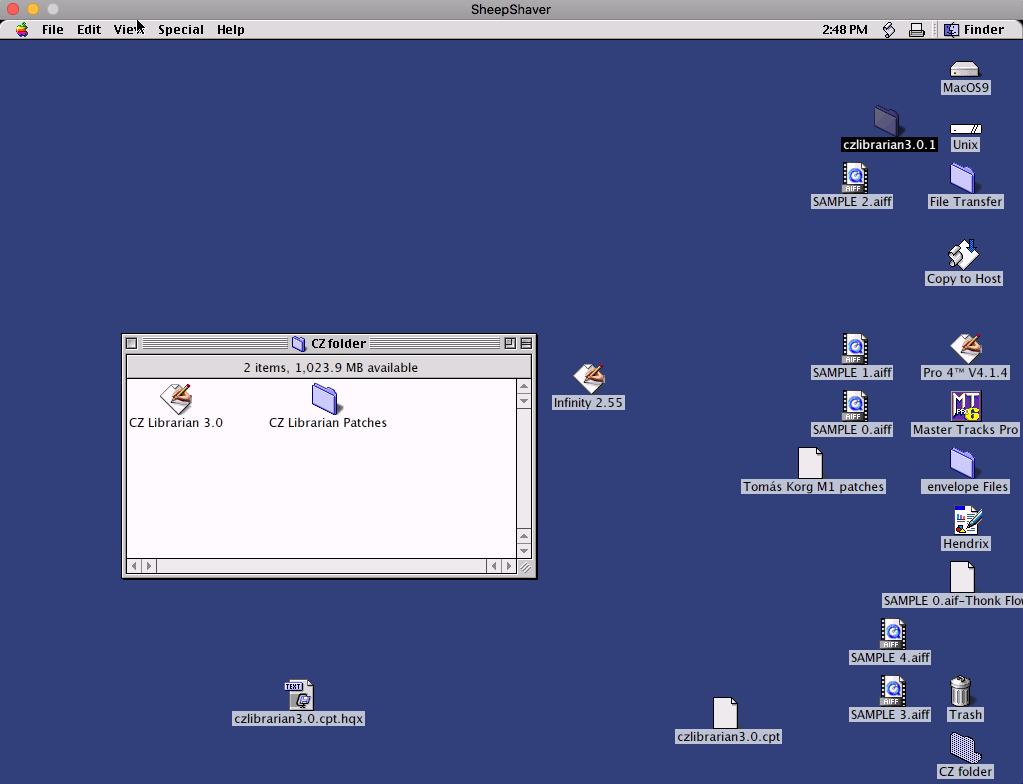
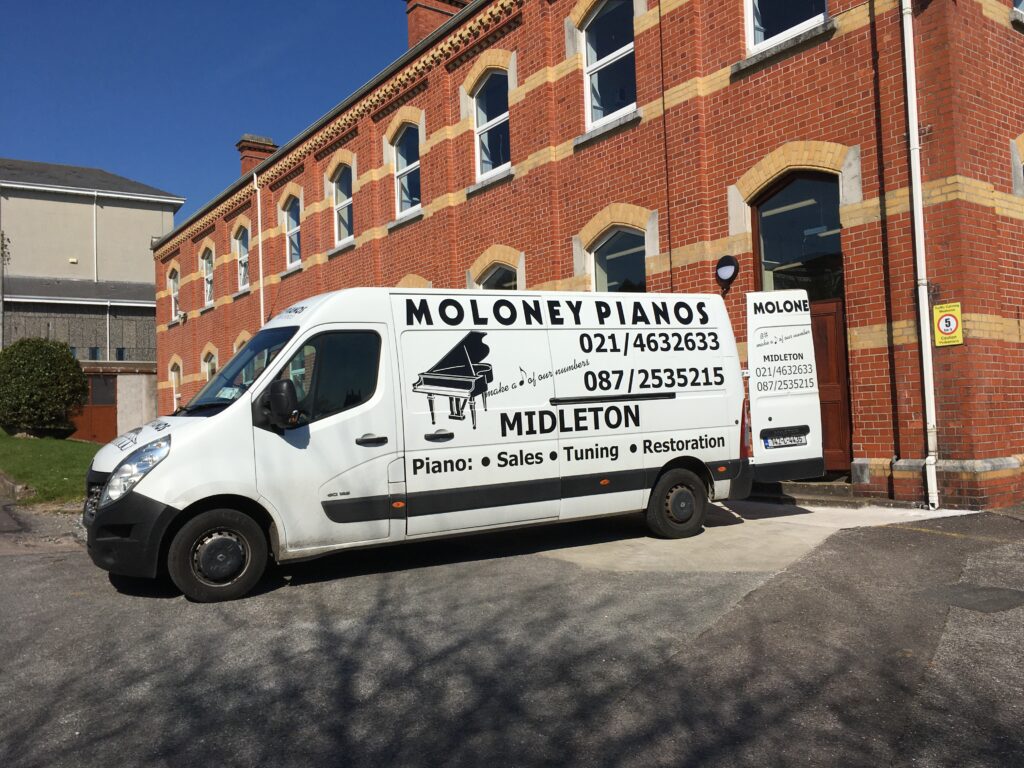
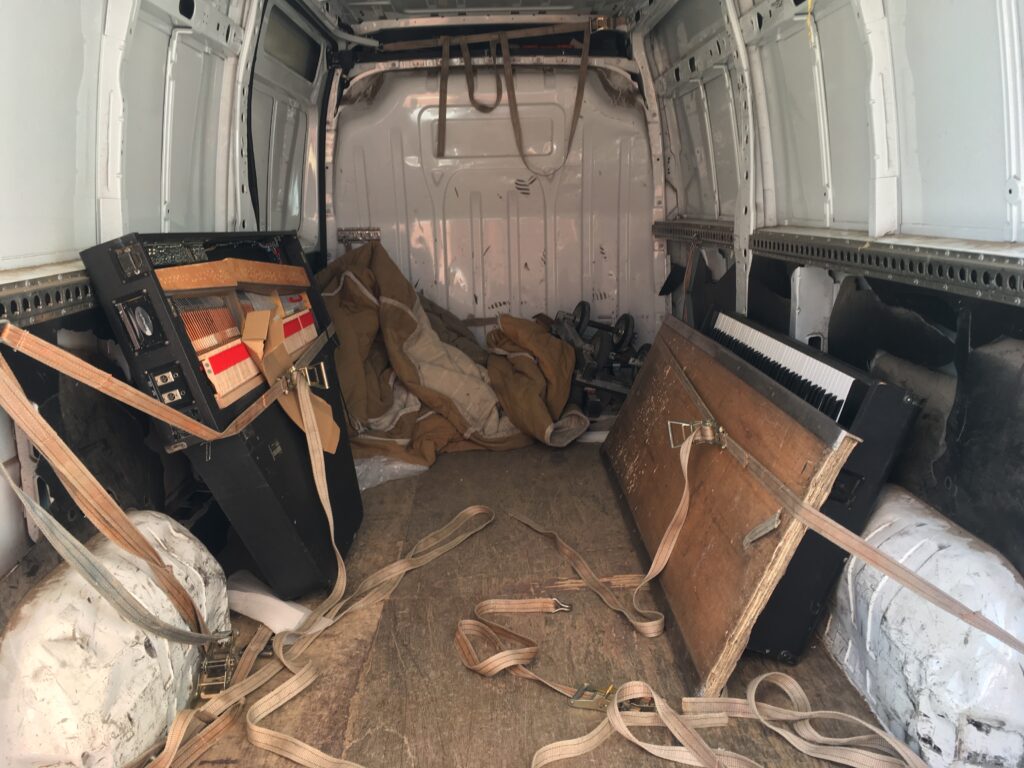
I had a chance to liberate a Yamaha CP80 from a school in Cork who were not using it. My friends at Moloney Pianos loaned me their van, isn’t it cool?

Don’t do this…

The first stumbling block was that the flight cases were missing. The piano comes in two parts, that’s the harp on the left and the keyboard on the right. I only used one strap for the harp, so it slipped on the journey home with a very loud bang! Thankfully these pianos are incredibly well made, so there was no damage apart from a small tear in the faux leather finish (known as tolex in the US).

How NOT to move a CP80!

A dream I didn’t know I had

A long time ago I had a conversation with Jenny Lindfors about what our favourite electric piano was. She argued for the Fender Rhodes, I argued for the Wurlitzer EP200. Not only was she wrong (the Wurlitzer has the superior timbre, sorry Jenny just kidding!) but I was in a way denying myself. My ultimate favourite is the Yamaha CP80. But these are bigger, rarer and more expensive than the others. I just never dreamed I could own one.

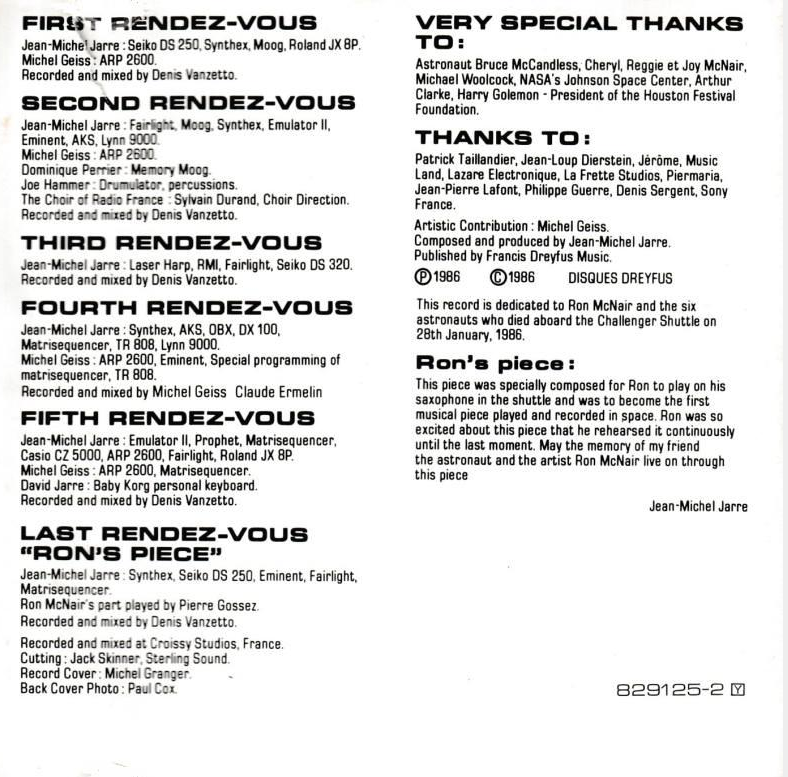
What does it sound like?

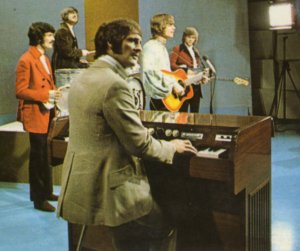
It was the instrument favoured by Prince, Peter Gabriel, Tony Banks, Brian Ferry, U2 and Simple Minds. For the classic album So, Peter Gabriel really only had the Fairlight, the Prophet 5 and the CP 80, with occasional Yamaha CS80. If you listen closely you will hear that an awful lot of the sounds on the record are CP80 with a lot of effects, particularly things that sound like bright electric guitars, bells, Gamelan and tuned percussion; as well as regular piano. Unlike the Rhodes and Wurlitzer, the CP is a chameleon.

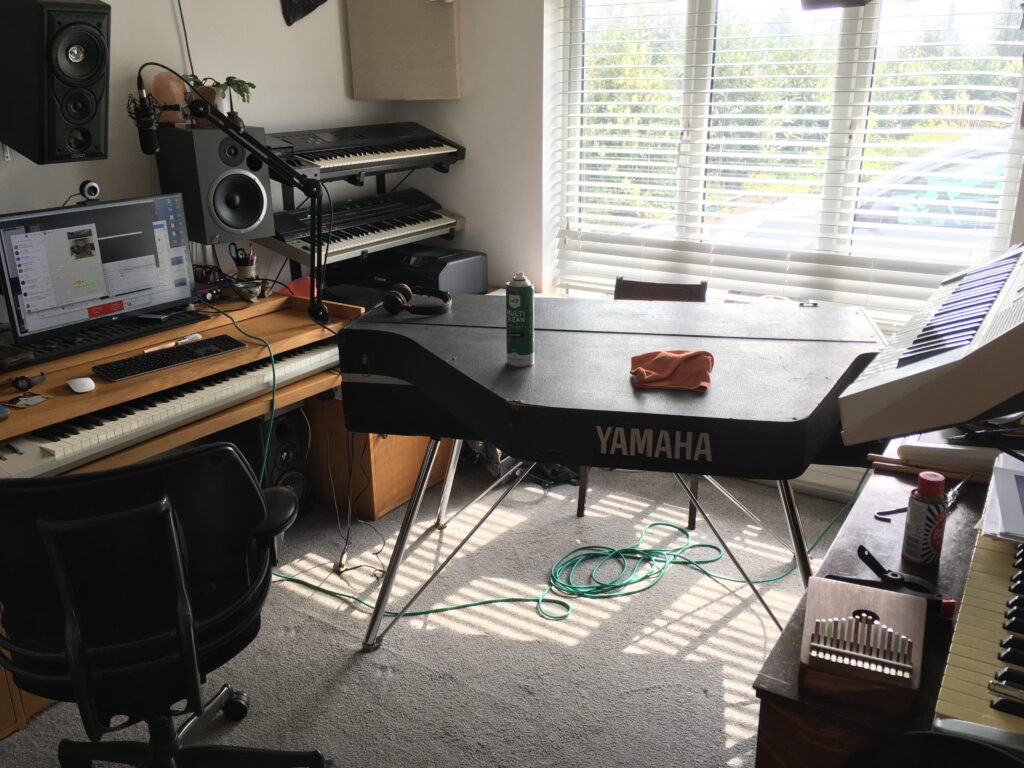
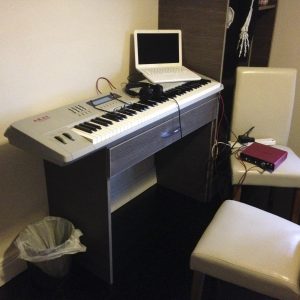
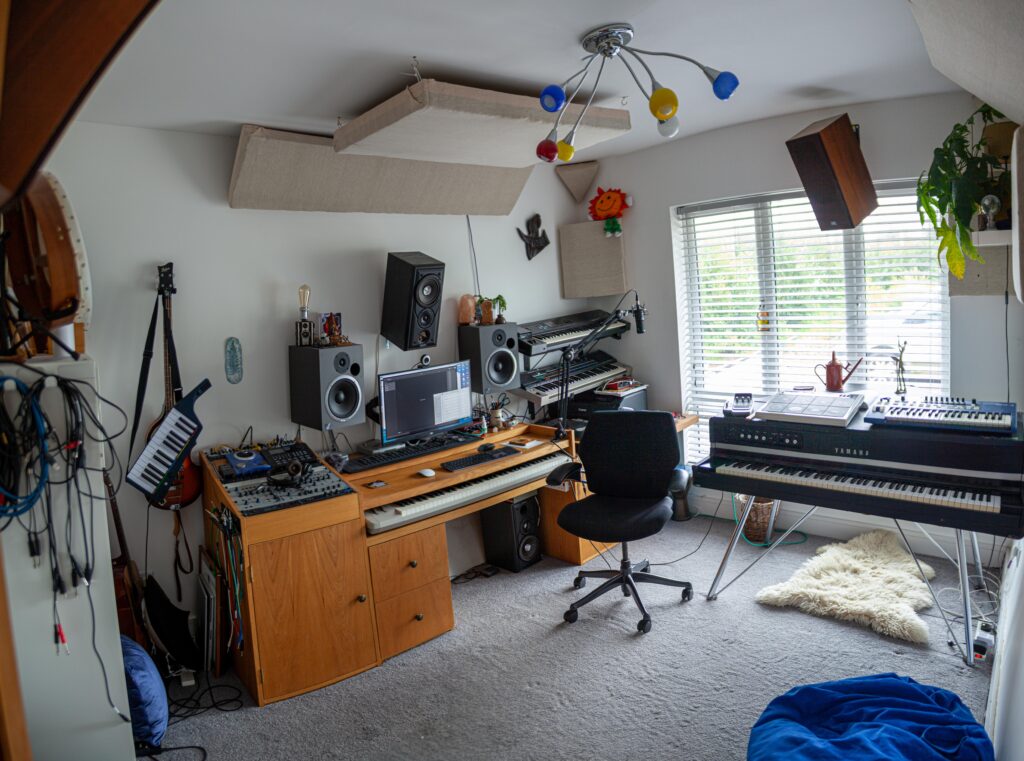
The CP quickly assembled in the studio

Careful, it’s heavy!

So I got it in to the studio, and with the help of a friend lifted the harp onto the keyboard. The brochure claims this is easy- it is not. The harp weighs over 60kg, and the hinges you must attach it to are very small. Don’t attempt it before both people are fully aware of how the hinges attach!

Getting started

First thing was to clean off the mould and dust that had built up on the case and keys. This was easy, using Tec7 foam cleaner and elbow grease. It became apparent that someone had used some kind of solvent based leather cleaner on it in the past, this made an unpleasant smell for a while but this was thoroughly removed with the Tec7.

Repairing the Power Supply

Someone did a messy job “converting” it to 230V. Incredibly, they decided to remove the XLR power connector and twist on the bare wires from the new PSU. There was not enough space for the rest of the power harness so some wires had to be lengthened and soldered back. At least they used a good quality transformer!

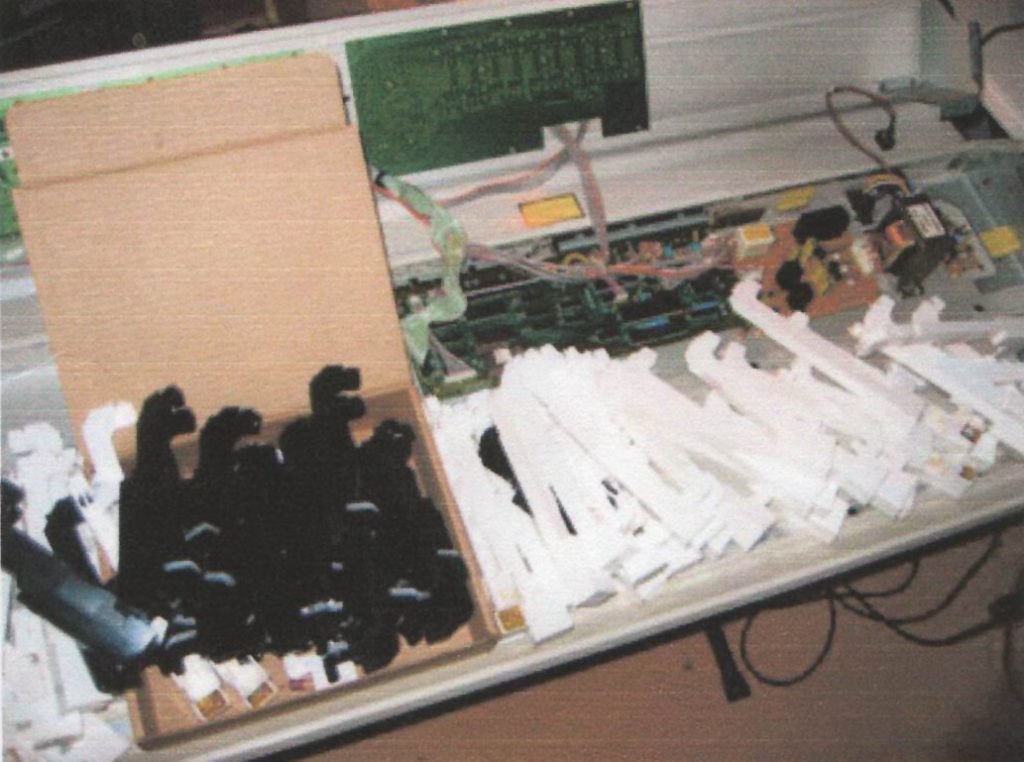
Working on the pre-amplifier

It was apparent that the smoothing capacitor was underperforming, this was confirmed by removing it and testing. I replaced it immediately. I suspect that some of the capacitors in the audio path may also need replacing. The output seems to be relatively dull sounding. I plan to test this observation by bypassing the pre-amp and doing an AB test with a split signal (possible because the impedances are so high). The pre-amp is incredibly well designed, it is all discrete with transformers for the balanced outputs. There are only two ICs, these are to control the tremolo so they are not in the audio path as far as I can tell. It is very very clean sounding.

Tuning it…

I spent a couple of days trying to tune it myself. It’s not as hard as a regular piano, and Yamaha even list the exact pitches in a table so you can do the stretch curve correctly. Even still, this is best done by an experienced piano tuner! I like to think I made his job a little easier by getting the pitch a bit closer to concert 🙂

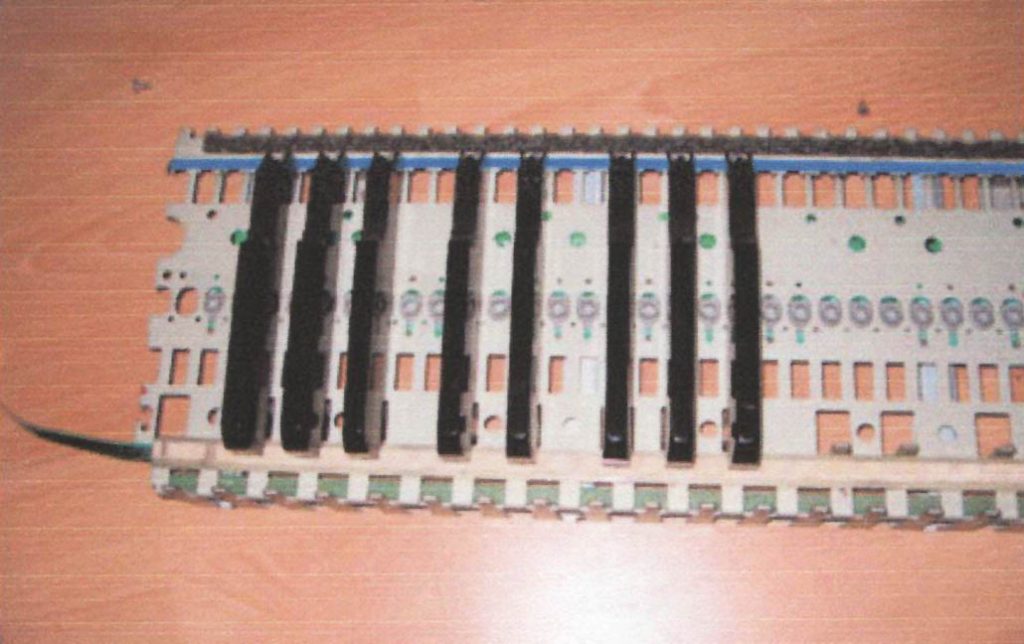
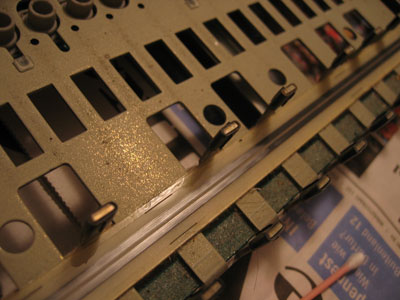
The sustain pedal works by lifting these dampers

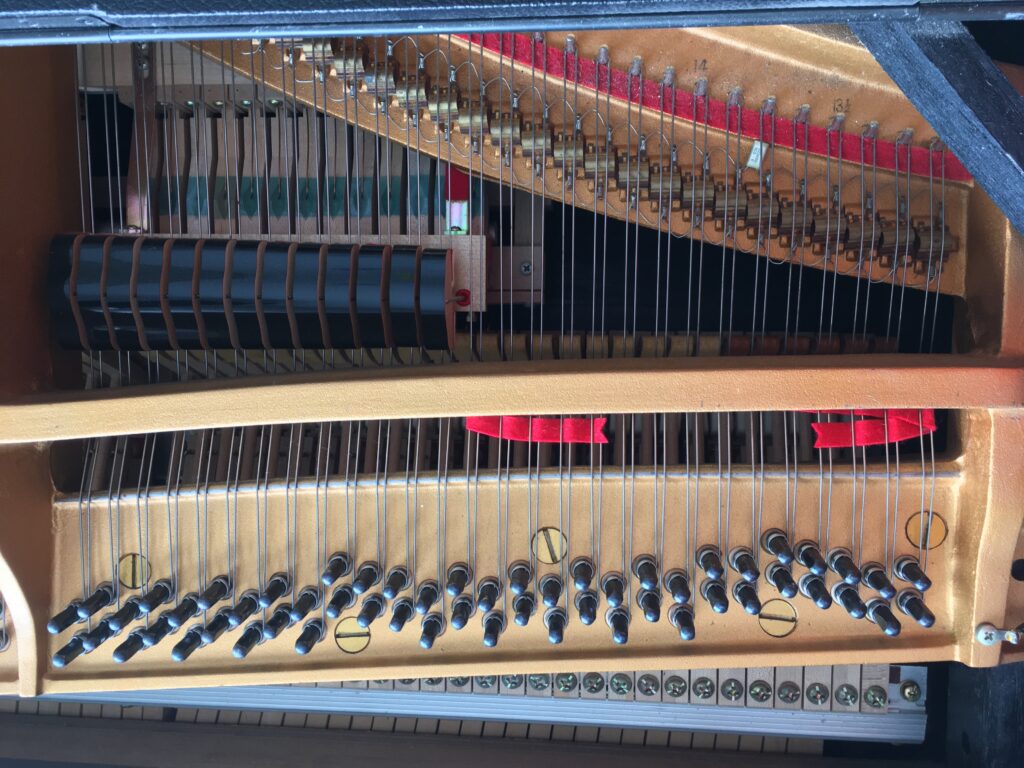
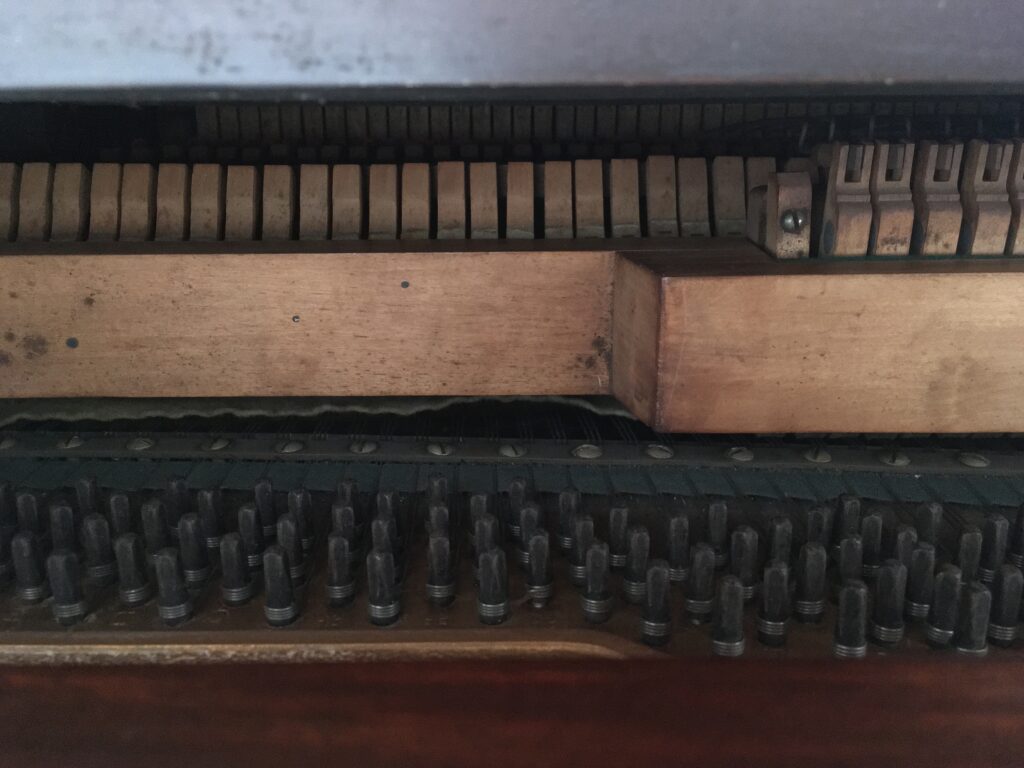
The dampers are those black things. When you press the sustain pedal, it lifts them off the strings so they are not damped, and will sustain. There are no dampers on the top 14 keys- this is normal for a grand piano (that’s the CP on the left). On a regular upright, there are no dampers for the top two octaves (right).

Nina really likes the vibrations from the piano. You can see the Tec 7 in the background.

The expert arrives

Chris, the expert at work. It really took 3 days to get everything right. Here he is just beginning regulating the action.

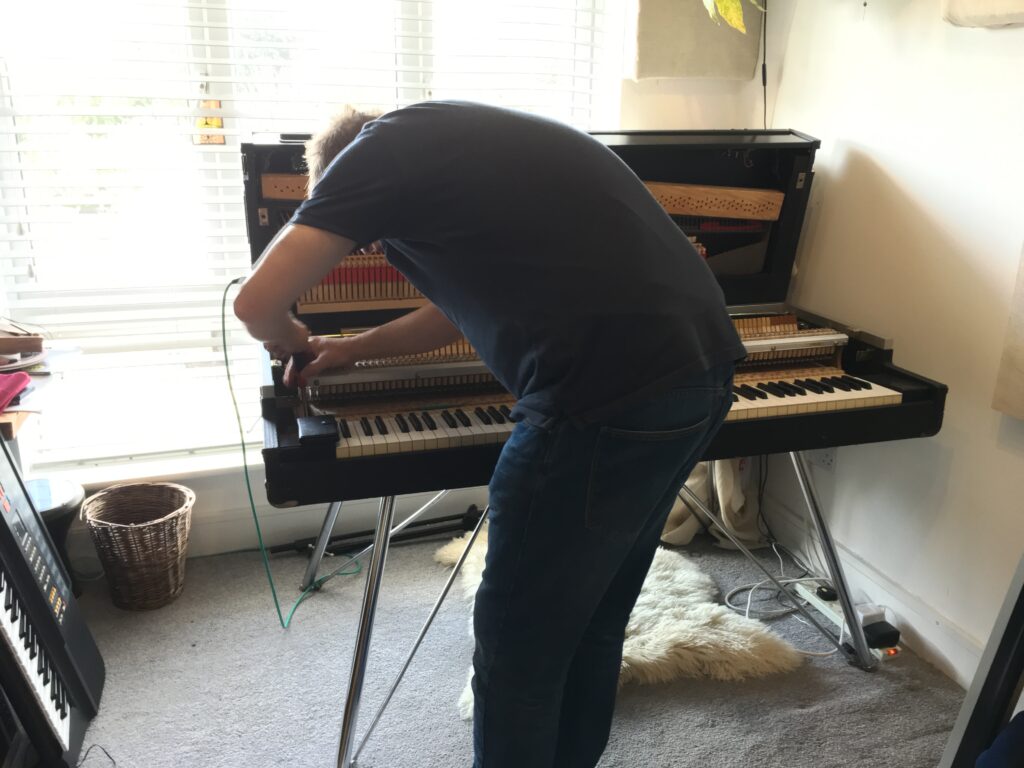
Since it had not been services in at least 10 years, the action had become stiff and heavy. There are about 8 hinges on each key, and a bunch of other adjustments. It’s exactly the same mechanism as a Yamaha concert grand piano. Making this work smoothly, with musical dynamics, is known as “regulating”. I briefly considered regulating the action myself. Moloney’s had a Yamaha grand that was being regulated by Chris Moore, so I went along to see how it’s done.

Within about 30 seconds of observing Chris at work I realised this is a highly skilled job best left to an expert! It was quite a nice grand piano when it had arrived at the shop- after Chris spent the best part of a day on it, it was incredible. So I asked him to do the CP80.

It’s such an inspirational instrument, I have a Zoom H2 permanently connected to the unbalanced line outputs to capture ideas. I use the balanced XLR outputs for recording in the DAW.
Studio re-arranged to accommodate the inspiration machine 🙂
Nina loves it 🙂

What’s next?

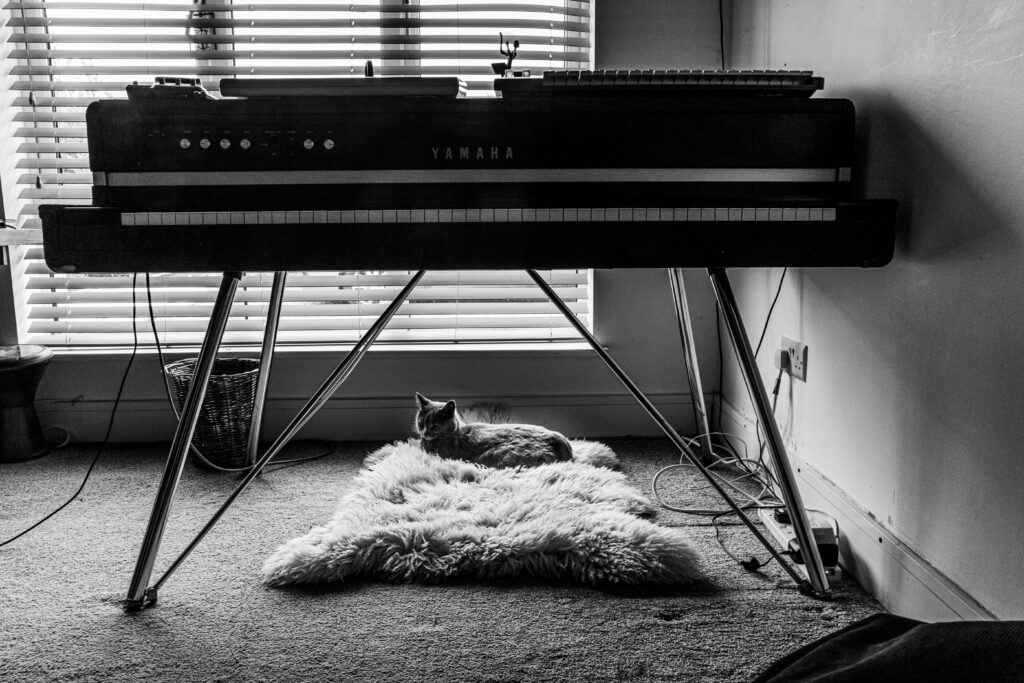
Finally, I sourced a sustain pedal for it. I plan to release an album fairly soon. It will have lots of CP80 on it!

Sound Design for Arturia CZV Synthesizer plugin

So after a few months under a Non Disclosure Agreement, I can talk about the new Arturia CZV plugin because it has been released for a few weeks now.

Arturia found me originally because of my long-running blog post all about the Casio CZ series of synthesizers which you can read here.

Just before the release, Arturia interviewed me for their Sound Designer page, but I cannot wait to talk to you all about this so I have published it here. I also found an old photograph of my first studio, which I talk about towards the end. So I think this could be interesting for all you music technologists out there!

Arturia: What is your favourite preset and why did you choose it?

My favourite patch in this set is called Atmosweep. It originated from a set of patches that were accidentally randomised when my CZ RAM cartridge ended up in the washing machine! Amazingly it still worked! After that I worked on the sound for a long time to get the release and atmosphere. The patches from the washing machine used the resonant waves in ways I hadn’t thought of so it was fun to explore this happy accident. With CZ-V my archive of patches since 1992 has really come back to life. Several years ago I deep-sampled 102 of my favourite CZ patches for Kontakt (you can still hear those here). Now I can finally put those away and use the sounds in a much more organic way in CZV with the Macros.

I was stoked to see three of my sounds in the “Featured” list!

Arturia: What are the main strengths of the CZV according to you? Did some specific features or aspect positively surprised you in the instrument?

Tomás: Yes I was pleasantly surprised that the real character of the hardware is right there in CZV! And to answer your question I think there are four main strengths, in order of importance:

1.    The percentage level control on each envelope really opens up the possibilities in a very big way, allowing the CZV to respond to the player in a much more organic way from modulation. It also makes it much easier to have bright or dark within the patch. Even on the CZ-1 with its limited velocity modulation, I would make several versions of a patch going from dark to bright, in order to get this same depth. It was much more laborious than it is with CZV. Now it’s so easy to tweak the patch so that it sits right in your track. I love it!

2.    Of course the DCW level can now be swept in real time like an analogue filter, not just with the envelope. This gives a sound unique to the CZ. It’s quite different to sweeping the harmonics on an FM synth (or an analogue synth) and can really warp sounds in a spectacular way, while still keeping the flavor of the basic patch. 

Analog Lab library of programmers

3.    I love the chorus. With one voice it is very much like the hardware CZ, and with two or three voices it is lush like the Roland Juno chorus. It is pretty much the perfect chorus for a synth!

4.    When I got the initial spec from you, it was the looping envelopes that most excited me. I would have killed for this feature on the hardware, back in the day. It took me a while to figure them out, but I did, with relative ease, and they are hugely useful.

Arturia: What was your approach regarding your sound design work ? Had you a specific type of sounds in mind? A specific method?

The old CZ Librarian running in Sheepshaver VM

Tomás: There are two answers to this, because I have been using a CZ since 1992, starting with the CZ-5000 and ending up eventually with the CZ-1. Back then it was my only polysynth. With the sequencer it was like an affordable workstation, so I wanted it to make every sound possible. An impossible goal, but a great way to learn everything about a synth. I wanted the sounds that I heard on classic records, such as Jarre’s Rendezvous where he uses the Fairlight and the Synthex as well as the CZ-5000. I would spend a lot of time trying to get these classic sounds on the CZ, and learning what the limits and unique qualities of the synth were.

Later when I had more synths I used the CZ-1 for its strengths. To me it is a wonderful bass machine. I love pad sounds too, and the CZ does these with a unique character. You won’t get wide soft MemoryMoog pads, but you can get some very atmospheric stuff using the resonant waves with the envelopes for movement within the sound. Nothing else sounds quite like it.

I always carefully backed up my patches and kept them well organized with descriptive names, first with cassettes and later with SysEx on the Apple Mac. So I was able to load my library into CZV. It’s so cool to see the patch names you made years ago coming up in the list!

The second answer is that with CZV it is more of an adventure. This is because it is exactly the same as the old hardware and at the same time is a very up to date synth with all the features we take for granted in software today. So the method was simply to explore and have fun! Several times I started from an initial patch and just explored the new possibilities, especially with the extra Mod Envelopes, the more detailed velocity modulation and the Custom Waveform.

But more often, I was able to take an old patch and make it more like what I wanted it to be from those classic records. Unison Mode really made that happen in a big way, and again the detailed modulation and the live interaction with the Macros made the sounds much more alive than is possible on the original machine.

Now the CZ is like a MiniMoog or a Prophet 5, with the sound-morphing easily integrating with your performance in a truly organic way. Thanks so much to the Arturia team for making the dreams of 18 year old me come true!

AKAI MX1000 Aftertouch repair

Last minute programming at the hotel

I’m still using an Akai MX1000 76 key weighted master keyboard. This thing was made in 1991. I rescued it from a recycling centre in 2007. It has served me well, it’s even done the Body & Soul music festival! It’s got a comprehensive MIDI spec so I was able to set it up to run an entire show in Apple MainStage remotely- start, stop, patch changes and level controls. Its off-white colour (typical of Akai at that time) looked good with a white MacBook and white T-shirt. I’ve also helped out with a modern re-engineered memory card, so this keyboard would be good for several hundred patch changes with MainStage. Brilliant!

It is old though, so it’s time for some maintenance. Some contacts will have corroded, and some capacitors might be coming to the 30 year mark and so need to be replaced. So I intend to document maintenance for this machine, and share what official documents I have.

First up is the aftertouch repair guide from the Lynxxx website, which is currently down for maintenance ’til 2040, apparently! Very funny.

Problem: Aftertouch on my Akai MX1000 Midi Master Keyboard is not working

Possible cause 1: Aftertouch cable disconnected.

During transport, the flat plastic strip that connects the aftertouch pressure sensor to the internal printed circuit board may have shaken loose. Gently insert the strip back into the connector.

Possible Cause 2: Aftertouch cable worn.

When the cable has been jammed into the connector roughly a couple of times, the leads on the cable may have worn. You can try cleaning them with a qtip and some alcohol. If the leads are damaged, cut a few millimeters of the cable and reinsert it.

Problem: Aftertouch on my Akai MX1000 requires extreme pressure on the keys

Possible cause: Aftertouch pressure sensor strip corroded.

After some years, the leads “inside” the aftertouch pressure sensor strip will start corroding, forming a thin non-conductive layer that degrades aftertouch performance.

Solution:

1. Open the Akai
Remove the upper row of screws from the back of the Akai
MX1000. Remove the screws holding the top cover down. There
are three screws located on the right in a mirrored L formation and
five more on the left that are also in a (normal) L formation. You
may have to remove the two screws above the small rim
underneath the board too. You can now gently open the upper part
of the Akai MX1000 which will expose the internal circuitry and
keyboard springs etc. (I will add pictures of this procedure later)

2. Disconnect and remove the keyboard
Disconnect the flat cable on the mainboard. Rest the top cover
against something so it cant fully flip to the other side once we
remove the wire holding it. Remove the four screws holding the
small metal support in the middle of the Akai (that has a ground
wire on it holding the top cover). You need to remove this in order
to be able to take out the keyboard. Remove the large screws on
the bottom of the Akai that have rings around them. These hold
the keyboard itself in place inside the MX1000 casing. Remove
the remaining screws on the left lower side of the Akai that are
supporting the left side-panel of the MX1000. You can now gently
move this section (including the mod and bend wheels) a few
inches to the left, allowing you to lift up the keyboard from the
chassis.

3. Remove the keys
Remove the springs. Gently insert a screwdriver in the back ring of
the spring and remove it Be careful. These little bastards will
easily hit you in the eye if you don’t pay attention. Now remove the
keys. Start with the white keys first, then do the black ones.The
first key on the left is the “E”, marked with a double “EE” sign to
signify the first key (last key is signed “GG”, all others have single
letters). You can remove the keys by slightly shifting them towards
you and then lifting the ends. If they get stuck, give the little white
plastic hooks inside a little push.

4. Store the stuff
Make sure you keep all the keys and springs together in the same
place. Parts are hard to find, so you don’t want to lose anything
here.

5. Disassemble aftertouch strip
Once all the keys have been removed you will be able to gently
remove the upper layer of the aftertouch pressure sensor. This is
the white felt strip on the front part of the top. The top layer
consists of a felt strip glued to a plastic strip with some white
conductive material which is glued to the bottom layer with a sticky
Post-It like glue. You can easily remove this layer and press it
back on later.


6. Clean the pressure sensor
Once you have removed the top layer of the strip, you should be
able to see the two metal leads that acre causing the problems.
use a q-tip with some alcohol to remove the thin black film on top
of the grey/silver coloured leads. You may have to repeat this
process a couple of times until the strip stops colouring the QTips.
Don’t force it though. If you rub it too much you will damage the
strip beyond repair :-(. Gently rub the strip with some dry cotton
QTips to make sure everything is properly cleaned. Note the
difference between cleaned and corroded area in the picture. Wait
until everything is completely dry and free of any cleaning alcohol.
Now gently press the top layer back onto the pressure sensor.
Check the cable (see above) and reinsert the keyboard into the
Akai MX1000 case. Reconnect the flat cable, insert all the screws
into their original locations and close the cover.

7. Test it!
Select the System Menu and press Transmit. The display will now
show all outgoing MIDI data. If you press a key a little harder than
normal you should see the aftertouch messages scrolling by. You
can now assume your Mighty Marvel Pose #38 :-).

Sounds for Virtual CZ, and the real CZ

The new sounds: VCZ
You can buy my new collection of patches in the Soundware Shop here. 66 patches specially tweaked for VCZ, culled from my extensive and well worked collection created over a period of 25 years. Showcases both the gentle, ambient and atmospheric qualities of the CZ and its punchy hard hitting bass sound. They are saved in vst3 format so you can use VCZs brilliant vst3 patch browser in any DAW, and move patches between them.


The old sounds: CZ-1
Having received a few requests from CZ users who liked my CZ demos, Here are the top 64 of the 102 patches used to create my “Authentic Casio CZ” Kontakt set. Check out the included OPMEMs where patches are mixed and detuned in various ways. It’s a simple and fun way to make new sounds. For example pick two different bass patches and experiment with the OCTAVE and LEVEL settings. The CZ-1 is made for bass. Another classic trick is to layer the CZ with an analogue (or virtual analogue) synth. That way you get digital bite and analogue depth in your bass. Saved in .syx format so you will need a MIDI sysex app to load them into your CZ-1.

Note that this bank is for the CZ-1 only, it is not directly compatible with other CZ synths.

Some background
As a result of my CZ article I was asked by Oli Larkin to beta test his virtual version. I spent some time tweaking my old patches to take advantage of some of the features of VCZ, in particular the better velocity response and the chorus options. I really preferred Chorus A the Roland Dimension D model, having always had a love/ hate relationship with the Casio chorus.

Screen Shot 2015-04-18 at 1.49.06pm

The two chorus options in VCZ


The CZ envelopes are very flexible and one of its great strengths, but let’s face it, they’re not easy to adjust on the original. With a computer based editor, there was always a short lag and an interruption to the sound while the sysex was sent. Oli’s implementation is much smoother to work with than the original, so some of the patches benefitted from that with tweaks.

Much improved UI for envelopes

Much improved UI for envelopes

He has also implemented a Unison mode which is great sounding. Currently it’s monophonic so I’ve implement it on only a few patches. I can’t wait for the update with polyphonic unison! 🙂

Screen Shot 2015-04-16 at 4.08.59pm

New sounds for an old sampler

I got my old Yamaha TX16W back after it spent eight worthy years in a friend’s studio doing backing tracks for a covers band. The release of the Cyclone plugin from NuEdge spurred me to load up my old library. I’d forgotten how many great sounds I made with this thing! It has a unique character, dark and moody. It’s also great at drums.

So I have two new products: a set of 7 disks of unusual sounds from my extensive library, and a 2 disk set of drums. These will load in a real TX16W running Typhoon, and in the Cyclone plugin too.

The demo was created with the plugin and limited to 16 voices like the real thing. Some reverb from a contemporary Alesis Quadraverb IR. No eq apart from a touch of top end boost on the stereo mix.

madtheory TX16W discs
Unusual pads, atonal chords, synths and atmospheres showcasing the unique qualities of this sampler. Low sample rates, extreme transposing and those weird filters that kinda don’t do much but still add a vibe. The samples are entirely original, there’s nothing here from the original Yamaha Japan or UK libraries or the Muki Pakesch archive although there is a small number of sounds from various magazine CDs- but using some tricks of the TX with Typhoon.

madtheory TX16W drumkits
The TX16W with Typhoon excels at drums. Snappy envelopes, multiple outs and straightforward mute groups, layering, mapping etc. Use these kits as templates for your own, or just enjoy sharp sounding TR-808, TR-909, TR-505, DR-110, CR-78, Linn Drum and SCI Drumtrax kits, as well as my own “Realdrum” kit made up of a selection of sounds from classic digital drum machines.

Famous Samples part 3: Choirs

So this week we have three sounds. I can’t get enough of keyboards that go “awh”, and neither can anyone else apparently. Back in the seventies the choir was the main reason bands took the heavy and unwieldy Mellotron (instead of a choir) on tours around the world. No synth could do that sound. But the Mellotron used several miles of analogue tape, which was not very reliable.

Changing_the_tape_cartidge_on_the_Mellotron

Several miles of tape in a Mellotron

moodyblues

Mike Pinder on Mellotron with the Moody Blues

When the Fairlight arrived, everyone used it for voice sounds. All digital, no more wobbly and unreliable tapes. Variations of people going “awh” then transposed up and down the keyboard almost defined the sound of the eighties. The Fairlight had two whole disks comprised almost entirely of “awh” sounds: “Humans I” and “Humans II”. To be fair, there was also “La” “Doo” and “Mmm”, plus screams, laughs and farts. But you know which one got used the most- the famous Arr1 voice. That’s an “Ah” with a bit of an “Rrr” in the sustain. But Arr1 has been done to death, so I’m not doing it again here.

So first up it’s the choir from the Fairlight series 3. Given the pedigree, I guess Fairlight decided they had to have a seriously good choir. And they achieved it. A professional choir with excellent balance all going “Awh” for as long as you hold down the keys. This is a very beautiful sound. It does have an odd noisiness to the high end, but it is an eminently useable sound. I used it in this track layered with a Mellotron for a great spooky effect.

a3970914745_10

madtheory: aphelion. Reverse reverb, Theremin, Fairlight and Mellotron choirs.

Next is the Emulator II choir sound. Emu managed to acquire the original Mellotron master tapes, so this choir is a very nice combination of the male and female choirs from those, nicely looped and mapped across the keyboard. The later Emulator III library has a fuller version of each Mellotron sound. It’s cool to use them without the extra weirdness imparted by the tape playback on a real Mellotron. They sound more timeless to my ear. The tape sound dates things, in a good way. But it still has that “dead people singing” effect. Or dead people going “Awh”.

Lastly, it’s the choir from the Kawai K4. Every synth manufacturer raced to get that Fairlight sound from a cheaper instrument. So in many cases they simply sampled the Fairlight or the Emulator II. Examples abound from the Korg M1 choir (a cut down version of the series 3 choir) to the Casio FZ-1 and Ensoniq Mirage strings (versions of EII marcato). This K4 sound was used very effectively on the B Side of LFO’s eponymous debut hit, a techno classic. Cmin, Amin, Eb min, root position, lots of reverb. Enjoy 🙂

Here are the three samples in Kontakt 5 compressed format: Famous Choirs.

Famous Samples Part 2: Fairlight Strings

Last week I spoke about how the Emulator was a much more advanced sampler than the Fairlight. The Emu machine used shared memory, so all of the samples could be mapped across the keyboard for polyphonic playing. The Fairlight being a much earlier machine was more crude. There was one memory for each of the 8 notes. So while you could map samples across the keyboard it was not possible to play all of those samples polyphonically, although it was “multi-timbral” in that you could play eight different sounds at the same time. The Emu could do that too, but in a much more musical manner because of the shared memory.

Perhaps because of this limitation Fairlight sounds tend to be more special sounding whereas the Emu tends towards utilitarian, for example replacing string players, rather than doing new things with sounds. Because only one sound could be sampled into the Fairlight people tended to put a lot more time and effort into them, and that one sound became a focus of attention. You had to have a sound that worked well across the entire range of the keyboard. The Fairlight transposed the sound by changing the playback speed, whereas the Emu basically left out bits of the sound instead, because it was not possible to change the speed of each sample separately with shared memory- it would change the speed of all samples in memory, which would bet pretty annoying! Also because the Fairlight was the first sampler, artists who desperately wanted to work with natural sounds would have used that first, so the gloss of the new had worn off by the time the Emulator came along. Bear in mind that tape allowed artists to work in a similar way, but it was vastly more time consuming and complicated.

Our famous sound for this week is (usually) called LOSTR2 (download the Fairlight strings zip file here) in the official Fairlight library. I say usually because there were at least three, possibly more, versions of the “complete” library. There is another quite different sound with the same name. So it actually took me a few years to find the original version of this sound. It seems to be from the series I machine, which means it was sampled at only 16kHz. There  isn’t really a single official library, partly because there were 3 versions of the 8 bit Fairlight (I, II, IIx) and also at some point the extant sounds were edited so that they were properly tuned and looped for the IIx. This was done by the Fairlight programmer Peter Weilk, apparently by recording the sounds back to tape and varispeeding them! He still sells and services these wonderful machines today.

LOSTR2 is one of those rare single samples that sounds great above its original pitch and below it. So I’ve included two versions of the sound. One was taken from the analogue outputs of a famous Series III, the other is directly from a disc image file so it’s an 8 bit 78kbyte audio file. There’s a lot of mileage in editing the start point on this sample to change the attack, as you can hear in these two Kontakt programs.

Here’s a madtheory track called Avez Vous…? featuring extensive use of LOSTR2.

This is a very powerful sound, and probably got used just as much as Marcato Strings, but is probably not as widely known. Perhaps the most famous song it’s used on is Mike Oldfield’s international hit Five Miles Out where it’s cleverly vocoded with the guitar and also doubling the bass at another point. If you have the album you can hear it in a more exposed form on the long instrumental “Taurus II”.

Equally well known would be the middle section of U2’s Unforgettable Fire, programmed by Brian Eno on a hired machine in Dublin. You’ll also hear the ORCH5 orchestra hit for which the Fairlight is best known. It’s an excellent bit of arranging, with Fairlight VPIZZ pizzicato. And lots and lots of reverb 🙂 Here is Keith Emerson trying to convince us that the Fairlight sounds real:

The 8 bit Fairlight was never very good at loops. In Jean Michel Jarre’s“Night in Shanghai” you can hear that he stops sounding the note before it gets to the clunky loop point. Later in the song he lets rip on the keyboard- you can still here the loop but it’s covered by the other sounds and some echo and reverb. This is a nice genuinely live version of the song  from the China concerts in 1981. The opening shot is on stage so you can see him playing the Fairlight:

Here’s an older blog post where I did an analysis of Kate Bush’s use of Fairlight sounds, with audio examples.

Here it is on The The’s song “Twilight of a Champion” from their classic album “Infected”.

And here’s a Yello B-Side from 1983, the first time I ever heard this powerful sound and was fascinated by it:

Famous Samples part 1: Emulator II Marcato Strings

I’m a bit obsessed with old samplers, but I’m not really a fan of old hardware. Having owned several hardware samplers, I’m really happy these days with NI Kontakt and Redmatica Autosampler. The old hardware was limited in many ways. The cool thing is though, that a lot of talented people worked hard within those limitations, and got some excellent results. There are some older sounds that you wouldn’t really be inclined to do nowadays with gigabytes of storage. Like this classic string sound: 538kbytes!
e2

So we’ll be looking at the classic sounds from these samplers:

Emu Emulator
Emu Emulator II
Fairlight CMI I, II, IIx (the libraries overlap)
Fairlight CMI III
Casio FZ-1
Ensoniq Mirage
Yamaha TX16W

And a few other things such as the Kawai K1, K4 oh, and the Synclavier!

You might say this has been done before. Well it has, but not quite like this. Libraries like the excellent UVI material are sampled from the machine’s analogue outputs. Mine are different. I’ve looked at various ways of converting the old sounds from the original disks into Kontakt, trying to keep the original multisample positions and mod settings where appropriate. So we’ll start with the Emu Emulator II.

As a sampler, this was really more advanced than the Fairlight II, its only real competitor at the time. The Fairlight was also a sequencer and rudimentary additive synth. The Emu excelled with more memory, proper multisampling, velocity crossfading and an entire analogue synth engine. So it was more of a musical instrument than the Fairlight computer.

Of course, the sound quality was not perfect, so engineers of the day used all sorts of processing to get the thing to sit properly in a mix. Some people like the sound of crappy digital to analogue converters. Not me! But I think you’ll find it interesting how much of the character is encoded in the sampling process, rather than the playback process. Playing back these sounds in a modern sampler brings that sheen that engineers were always trying to get back in the day.

I converted the EII material using EMXP. First converting to SoundFont format (which Emu developed from the EII) and then importing that into Kontakt. The translation is seamless about 50% of the time! Sometimes you end up with strange filter settings and overlapping samples. Luckily, the classic Marcato strings is in the seamless category.

This sound was on the first disk of 5 sounds Emu released with the machine. It’s a big powerful sound even today. There’s a version of it tucked away in the Reason factory library. It’s been used on countless hits, but most notably INXS’s Never Tear us Apart, and the Pet Shop Boys West End Girls.

Here it is for download in WAV and Kontakt format. I’d recommend the free Kontakt player so you get the samples all set up correctly ready to play as they would been on a real EII.

E-II Marcato Strings

Update: for those of you using the WAVs, here is a text file with the loop points, tuning, mapping and VCA info.